


Experiencing robot vacuum issues? Robot vacuums are designed to simplify home cleaning, but they can encounter problems like loss of suction, charging failure, or navigation errors. If you’re searching for a way to fix all robot vacuum issues, this complete troubleshooting guide covers all common problems and practical step-by-step solutions.
Why Robot Vacuum Loses Suction?
Facing robot vacuum issues related to suction power? Loss of suction is one of the most frequent robot vacuum problems, impacting cleaning results. Learn why your robot vacuum loses suction and how simple maintenance steps can fix this common issue. Recover the cleaning performance of your device by following our robot vacuum troubleshoot tips.
Quick Diagnostic Checklist: Suction Issues
- Look: Is the dustbin full? Are filters dusty or brushes tangled?
- Do: Empty the bin, clean or replace the filter, and remove hair/debris from brushes.
- Retest: Run the vacuum on a small patch of floor. Suction should return to normal.
Common Causes of Suction Loss
- Clogged Filters: With regular use, filters can accumulate dust, dirt, and hair, obstructing airflow and decreasing suction strength.
- Clogged Brushes: The brushes on the vacuum can easily become tangled with hair, dust, and other particles, restricting movement and suction.
- Full Dustbin: If the dustbin is full, the vacuum may struggle to collect debris, affecting suction performance.
Solutions to Remove Suction Power
- Clean or Swap the Filter: Take the filter out and clean it under water (if washable) or tap it to shake off the dirt. If it’s too clogged or damaged, replacing it may be necessary.
- Clear the Brushes: Check the brushes for any hair or debris. Use scissors or a cleaning tool to cut and remove any stuck objects.
- Empty the Bin: Make it a habit to empty the dustbin after every use. If it’s too full, it can obstruct airflow and reduce suction.
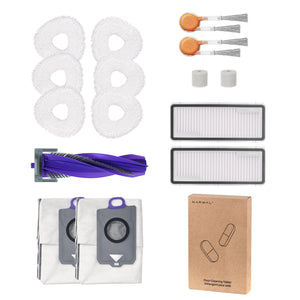
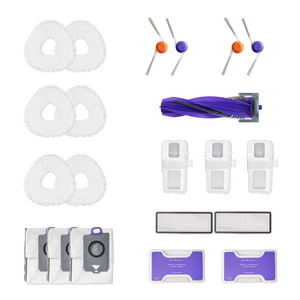
Filter and Brush Maintenance
- Filter replacement: Replace every 2–3 months under normal use. In homes with pets, change every 1–2 months.
- Side/roller brushes: Check weekly for hair tangles and replace every 6–12 months.
- Dust bag: A 2.5L dust bag usually lasts 90–120 days, depending on cleaning frequency.
Prevent tip: Some advanced models, such as Narwal Flow, feature self-cleaning mops and powerful 22,000 Pa suction, helping to prevent suction loss and reduce manual filter maintenance.
[cta:flow-robot-vacuum-and-mop]
Why Robot Vacuum Gets Stuck?
Is your robot vacuum getting stuck during cleaning sessions? This is a common robot vacuum issue, but there are quick ways to resolve and prevent it. Our guide provides expert tips to fix all robot vacuum issues, including steps to ensure uninterrupted and efficient cleaning on every run.
Quick Diagnostic Checklist: Getting Stuck
- Look: Are there toys, cords, or rugs blocking the path? Is the floor uneven?
- Do: Clear clutter, tidy cables, and adjust cleaning zones in the app.
- Retest: Place the vacuum back in the same area to check if it passes smoothly.
Common Causes of Robot Vacuums Getting Stuck
- Obstacles: Furniture, rugs, and small objects can obstruct the vacuum’s path.
- Tangled Cords: Cords left on the floor can become tangled in the vacuum’s wheels or brushes, causing it to stop moving.
- Inadequate Floor Types: High-pile carpets or uneven floors can make it difficult for the vacuum to move freely.
How to Stop the Vacuum from Getting Trapped?
- Clear the Path: Before starting a cleaning session, ensure the floor is free of obstacles, such as toys, furniture, and rugs.
- Tidy Cables: Use cable clips or straps to keep wires off the ground. Additionally, some vacuums have “no-go” zones that you can set up in the app, which help avoid areas with cords.
- Adjust for Carpet Height: If your robot vacuum struggles with certain types of floors, check if it has a setting for adjusting suction power or height. Some vacuums also allow you to change cleaning modes for different surfaces.
Obstacle Crossing and Clearance
- Threshold climbing: Most models handle up to 20 mm (0.8 in); advanced units like Narwal Flow can cross thresholds up to 40 mm (1.6 in).
- Minimum height clearance: Robot vacuums typically need at least 95 mm (3.7 in) to pass under furniture.
Premium devices like Narwal Flow use dual RGB cameras and AI obstacle avoidance to dodge cords and furniture legs in real time, minimizing the chance of getting trapped.
What to Do If Your Robot Vacuum Fails to Find Its Dock?
A robot vacuum failing to find its dock is a classic issue affecting cleaning continuity. This robot vacuum problem can be solved by maintaining clear sensor paths and optimal dock placement. Follow our troubleshooting steps to help your device locate its charging station every time.
Quick Diagnostic Checklist: Docking Problems
- Look: Is the dock placed in a tight corner or blocked by objects? Are the sensors dusty?
- Do: Clean sensors, reposition the dock in an open space, and ensure stable power.
- Retest: Start a cleaning cycle and confirm the vacuum returns to the dock automatically.
Why Your Vacuum Might Fail to Find the Dock
- Misaligned Sensors: If the sensors are dirty or misaligned, the vacuum might not recognize the dock.
- Dock Location: If the dock is placed in an area with obstacles or too far from the cleaning area, the vacuum may struggle to find it.
Ways to Help Your Vacuum Locate Its Dock
- Clean the Sensors: Wipe down the sensors with a soft cloth to ensure they are free from dust or dirt.
- Reposition the Dock: Place the charging dock in an open space, ensuring there are no obstacles around it. It should ideally be placed against a wall to give the vacuum a clear path.
- Check for Software Updates: Some models require software updates for better navigation. Ensure that the firmware on your vacuum is the latest version.
Docking and Placement
- Dock clearance: Leave at least 1.5 m (5 ft) in front and 0.5 m (1.5 ft) on each side of the charging dock. Avoid placing it in tight corners or near mirrors/glass surfaces.
- Floor level: The dock should sit on a flat, stable surface with less than 5° tilt.
- Wi-Fi signal: Keep the dock within 5–8 m (16–26 ft) of your router to ensure reliable navigation and return-to-dock performance.
These simple solutions can help ensure your vacuum always finds its dock when it’s time to recharge. Modern vacuums with AI-driven navigation, like Narwal Flow, can map surroundings more precisely and return to the dock even in complex home layouts.
Why Robot Vacuum Cleaner Can Not Charge?

Robot vacuum charging issues can stop your cleaning routine entirely. Our troubleshooting guide addresses how to fix robot vacuum charging problems, from cleaning contacts to checking dock alignment, ensuring your device is always ready for use.
Quick Diagnostic Checklist: Charging Issues
- Look: Are the charging contacts dirty? Is the dock stable on the floor?
- Do: Wipe contacts with a dry cloth, align the vacuum properly, and check the battery.
- Retest: Leave the vacuum on the dock for 15 minutes and confirm charging starts.
Common Reasons for Charging Issues:
- Build-up on Charging Contacts: Dust and dirt can collect on the charging points, preventing the vacuum from getting charged.
- Defective Battery: A worn-out or faulty battery may struggle to charge correctly.
- Unstable Dock Connection: If the charging dock isn’t connected properly or is placed on an uneven surface, the vacuum may not dock correctly.
Solutions to Get Your Vacuum Charging Again:
- Clean the Charging Contacts: Use a soft cloth to gently clean both the vacuum’s charging contacts and the charging dock’s contacts.
- Check the Battery: If your vacuum’s battery is old or has trouble holding a charge, it might need to be replaced.
- Ensure a Secure Docking: Make sure the charging dock is placed on a stable, flat surface and that the vacuum is properly aligned with the dock.
Battery and Lifespan
- Battery lifespan: Most robot vacuums last 500–800 charge cycles, or about 2–3 years of regular use.
- Charging habits: To prolong battery health, try to keep charge levels between 20% and 80% rather than letting the battery drain completely.
Following these steps will usually resolve charging issues and get your vacuum back up and running. High-end models also reduce charging hassles. For example, Narwal Flow comes with an AI-adaptive base station that auto-cleans mops, manages dust storage, and ensures reliable charging cycles with minimal effort.
Why Robot Vacuum Cleaners Make Noise?
While it’s normal for robot vacuums to make some noise, excessive noise can indicate an issue that needs attention. Let's explore the possible causes of noise and how to address them.
Quick Diagnostic Checklist: Excessive Noise
- Look: Does the noise sound like grinding, whistling, or rattling?
- Do: Remove hair/debris from brushes, check the motor for blockages, tighten loose parts.
- Retest: Run the vacuum again and listen if the noise is reduced or gone.
Possible Reasons for Excessive Noise
- Blocked Brushes: When the vacuum’s brushes are blocked with hair or debris, they can make a loud, grinding noise.
- Motor Problems: A malfunctioning or blocked motor can lead to a sharp or loud noise.
- Loose Parts: Loose or damaged parts, like the wheels or housing, can contribute to increased noise.
Practical Solutions to Reduce Noise Levels
- Clean the Brushes: Remove any hair, dirt, or debris that might be tangled in the brushes, which could be causing the noise.
- Check the Motor: If you notice unusual sounds coming from the motor, check for any blockages or debris. If the motor keeps having issues, it might need to be checked and repaired by a professional.
- Secure Loose Components: Check the vacuum for any parts or screws that might be loose. Tighten these parts to help minimize the noise.
By addressing these potential issues, you can keep your vacuum’s noise level in check and enjoy a quieter cleaning experience. Some designs, such as Narwal Flow’s DualFlow tangle-free system, keep brushes clear of hair, lowering the risk of grinding noises and reducing maintenance needs.
Common Robot Vacuum Cleaner Problems & Solutions

Other robot vacuum issues include navigation errors, sensor malfunctions, or poor cleaning results. Our expert troubleshooting guide covers quick fixes for all robot vacuum problems, helping you restore your device’s performance and reliability.
Quick Fixes for Other Common Issues
- Navigation Errors: If your robot vacuum is not following its cleaning path or gets confused, try resetting its mapping or recalibrating the sensors.
- Sensor Issues: If the sensors aren’t working as they should, clean them or recalibrate them through the vacuum app.
- Poor Cleaning Performance: Regularly maintain the vacuum’s brushes and filters to ensure consistent performance.
Most of these issues can be resolved with a bit of troubleshooting, ensuring that your robot vacuum continues to clean efficiently.
How to Reset a Robot Vacuum Cleaner?
If your robot vacuum is experiencing persistent issues or software glitches, a reset might be necessary. Here’s how to do it:
When to Reset?
-
Software Glitches: If your vacuum isn’t responding correctly or the app is malfunctioning, a reset can clear these errors.
-
Persistent Issues: If other solutions haven’t worked, resetting the device can help restore its functionality.
Step-by-Step Guide to Resetting
- Power Off: Turn off the robot vacuum.
- Press the Reset Button: Locate the reset button (often found on the underside or side of the vacuum) and press it.
- Wait for the Reset: Allow the vacuum to reset, which usually takes a few seconds.
- Restart and Check: Once you've reset the vacuum, restart and check it to see if the problem has been fixed.
Firmware and App Path Guidance
Many robot vacuum issues are solved simply by updating firmware or adjusting settings in the companion app. While exact menus differ between brands, most apps follow a similar path:
- Firmware Update: App → Settings → Device → Firmware Update
- Reset Device: App → Settings → Device Management → Reset
- Set No-Go Zones / Virtual Walls: App → Map → Zones/Restrictions
- Adjust Cleaning Modes: App → Cleaning Settings → Suction / Mop Modes
If you don’t see these exact names, look for similar wording like “System Update,” “Device Info,” or “Cleaning Preferences.”
Robot Vacuum Lifespan: How Long Do They Last?
Most robot vacuum issues raise the same question: is it worth fixing, or is the machine simply reaching the end of its life? On average, a well-maintained robot vacuum lasts 4 to 6 years, depending on usage, floor type, and build quality. Daily cleaning in large homes may shorten that span, while lighter use with regular care can stretch it longer.
The main wear points are batteries, brushes, and filters. Replacing these parts regularly can keep performance stable and prevent many common robot vacuum problems like suction loss or poor navigation. Premium models with self-cleaning systems—such as Narwal Flow, which washes and dries its mops automatically and uses a DualFlow tangle-free system—often require less manual maintenance, extending their functional lifespan.
If your vacuum frequently shuts down, won’t hold a charge, or continues to show repeated errors after troubleshooting, it may be nearing replacement time. But for most owners, consistent upkeep and timely part swaps are enough to fix robot vacuum issues and keep the device running smoothly for years.
Repair Costs: When to Fix vs Replace?
When dealing with repeated robot vacuum issues, many owners wonder if repairs are worth it or if buying a new unit makes more sense. On average, minor fixes like replacing filters, side brushes, or wheels cost less than $30–$60. Replacing a battery usually ranges from $60–$120, while major repairs such as motor or motherboard replacements can exceed $150–$200.
At that point, the cost may approach the price of a new model. Premium devices like Narwal Flow, with its self-cleaning system and tangle-free brushes, often reduce the frequency of breakdowns and lower long-term maintenance costs.
As a rule of thumb:
- Fix when the repair is simple, inexpensive, or the vacuum is less than 3 years old.
- Replace if the machine is near the end of its 4–6 year lifespan, or if repair costs are more than half the price of a new model.
By weighing repair expenses against expected lifespan, you can make a smart decision to either fix robot vacuum issues or upgrade to a model designed to prevent them.
Safety and Warranty Tips
While most robot vacuum issues can be fixed at home, some problems should not be handled by DIY repair. Attempting to take the device apart may damage critical components or void the warranty.
Stop DIY troubleshooting and contact support if you notice:
- Battery swelling or leaking — a swollen battery is a fire hazard and must be replaced safely.
- Burning smell or abnormal heat — this can signal motor or circuit damage.
- Unusual noises from the motherboard or motor — clicking, buzzing, or sparking sounds indicate deeper electrical problems.
- Persistent errors after reset and firmware updates — if software fixes don’t work, the issue may be hardware-related.
In these cases, it’s best to:
- Reach out to the manufacturer’s official support page.
- Check whether your device is still under warranty coverage before attempting repairs.
- Use authorized service centers for parts replacement to ensure safety and reliability.
By following these precautions, you reduce risks, keep your home safe, and protect your warranty rights.
Official Support Resources for Robot Vacuum Issues
While this guide covers the most common robot vacuum problems, some situations may still require brand-specific instructions or official servicing. Manufacturers like iRobot, Narwal, Roborock, and Ecovacs all provide detailed resources to help owners troubleshoot robot vacuum issues.
- Software & Firmware Updates: Official support pages often release updates that fix mapping errors, improve docking accuracy, or solve charging glitches.
- Model-Specific Guides: Many brands publish step-by-step repair manuals or FAQs to help you fix robot vacuum issues unique to your model.
- Warranty & Service Options: If your device still fails after DIY fixes, checking your manufacturer’s service page ensures you don’t void the warranty and get access to replacement parts.
Using these official resources alongside this complete guide can give you both the community-tested tips and the precise instructions needed to fix all robot vacuum issues reliably.
Community Insights on Robot Vacuum Repairs
Beyond official tips, many users share their own fixes in forums and community groups. Common themes include:
- Suction loss: Users often report that cleaning or replacing filters quickly restores power. This matches most expert robot vacuum troubleshoot guides.
- Getting stuck: Community discussions highlight how cable clutter is one of the biggest robot vacuum problems, and the simplest fix is tidying cords or using no-go zones.
- Docking issues: On Reddit, owners frequently note that moving the dock to a clear wall space solves most “can’t find dock” robot vacuum issues.
These shared experiences confirm that while official steps work, community-driven advice can provide quick reminders and practical hacks to fix all robot vacuum issues.
Keeping Your Robot Vacuum in Top Condition
Proper maintenance is essential for keeping your cleaning partner running smoothly. Regular cleaning, proactive troubleshooting, and prompt attention to any issues will ensure that your vacuum continues to work efficiently for years to come.
Remember, a little bit of care goes a long way, so be sure to check your vacuum regularly for any signs of wear and tear, and address any issues as soon as they arise. Of course, choosing a good robot vacuum, like Narwal, can also reduce the need for frequent maintenance and repairs. Happy cleaning!
FAQs
How to troubleshoot common robot vacuum models?
Most robot vacuum issues—such as suction loss, charging errors, or navigation glitches—have simple fixes. Start by cleaning the filters and brushes, emptying the dustbin, and wiping sensors. If problems persist, a reset or software update usually resolves them. These universal steps can fix all robot vacuum issues across most models.
What does a red light mean on a robot vacuum?
A red light often signals a serious robot vacuum problem, like low battery, brush blockage, or sensor malfunction. Try recharging, clearing debris, and resetting the device. In many cases, this quick robot vacuum troubleshoot is enough to restore normal operation.
Do different robot vacuum models need special fixes?
Not usually. Whether round or square, most robot vacuums face the same common problems: getting stuck, suction loss, or docking failures. Cleaning brushes, checking charging contacts, and updating software are universal solutions that help fix robot vacuum issues without brand-specific steps.
Why is my robot vacuum not moving?
If your device powers on but won’t move, the most common causes are tangled brushes, blocked wheels, or a drained battery. Clearing obstructions and fully charging the unit are the first steps in any effective robot vacuum troubleshoot.
What’s the difference between a soft reset and a hard reset?
A soft reset restarts the vacuum to clear temporary glitches without erasing settings. A hard reset restores factory defaults, wiping maps and schedules. Use soft reset for minor problems, and hard reset if you need to fix all robot vacuum issues that keep recurring.
Why does a robot vacuum move but not pick up dirt?
This usually means the brushes or suction motor are clogged. Cleaning or replacing the filter and brush restores performance in most cases. Regular maintenance prevents these robot vacuum issues from happening and keeps the machine working efficiently.

