Robot vacuums have completely revolutionized home cleaning by making it convenient to keep your floors clean. However, many users face the common issue of robot vacuums getting stuck or robot vacuum keeps stopping unexpectedly. Understanding why your robot vacuum keeps getting stuck or stops working abruptly can help you avoid frustration and maintain a smooth cleaning experience.
Understanding why this happens and how to address these issues can help you maintain a more efficient and hassle-free cleaning routine. Let's explore the common reasons behind a robot vacuum getting stuck and the solutions to keep it running smoothly.
Causes and solutions
1. Insufficient Battery Life
One of the common reasons for a robot vacuum getting stuck or stopping mid-cleaning is insufficient battery life. If your robot vacuum keeps stopping or fails to return to its charging dock, check the battery status and make sure the dock is easily accessible. A battery reaching the end of its life is a frequent answer to why does my robot vacuum keep stopping, and replacing it can restore performance.
Low Battery: The vacuum may not have been fully charged before starting the cleaning cycle, leading it to stop unexpectedly when the battery depletes.
Battery Health: The ability of a battery to charge decreases over time. This degradation reduces the operational time of the vacuum, causing it to stop more frequently.
Solution:
Ensure Full Charge: Always check to make sure your robot vacuum cleaner is fully charged in advance of starting to clean. Most models will return to their charging dock automatically when the battery is low, but it's essential to ensure the dock is accessible and the vacuum can navigate back to it.
Battery Replacement: If you notice that your vacuum’s battery life is significantly reduced, it might be time to replace the battery. There are replaceable batteries in many robotic vacuum cleaner models, and replacing old batteries with new ones can significantly improve performance.
2. Tangled Brushes and Clogged Suction
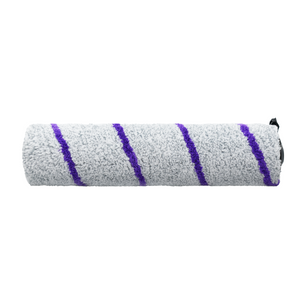
Hair, fibers, and other debris can easily get tangled in the brushes or clog the suction system, causing the vacuum to stop. This is particularly common in homes with pets or long-haired residents.
Solution:
Regular Cleaning: Regularly inspect and clean the brushes and suction system. Use a small tool (such as a toothbrush) to remove tangled hair and debris from the brush. Cleaning the suction inlet can also prevent blockages that hinder the vacuum's performance.
Preventative Maintenance: Schedule regular maintenance sessions to clean these components. By preventing severe clogging, you ensure uninterrupted cleaning sessions and extend the vacuum's lifespan.
3. Obstacle Detection and Sensor Issues
When your robot vacuum keeps getting stuck or fails to avoid obstacles, dirty sensors are often to blame. Regularly cleaning your vacuum's sensors can prevent robot vacuums getting stuck under furniture or stopping randomly. If your model keeps changing direction or stopping, always check the cleanliness and alignment of its sensors for optimal performance.
For users who want fewer interruptions, the Narwal Flow goes further: its TWINAI obstacle avoidance system with dual RGB cameras and an onboard AI chip can recognize and dodge over 200+ household objects with 0.19-inch precision, ensuring smooth, intelligent cleaning even in cluttered rooms.
Solution:
Clean Sensors: Remove any dust or debris by regularly wiping the sensors with a soft, dry cloth. The maintenance of the sensors is vital for the vacuum cleaner to accurately detect and avoid obstacles.
Test Sensors: Many robot vacuums come with companion apps that allow you to test the sensors. Take advantage of these features to ensure that all sensors are working properly and to identify any potential problems.
4. Trapped in Cords and Small Objects
Items like loose cables, clothes, or toys are a major reason for a robot vacuum getting stuck regularly. Clearing your floor of such hazards before cleaning can significantly reduce incidents where your robot vacuum keeps getting stuck. Use virtual boundaries or magnetic strips to help your robot avoid these problematic areas.
Solution:
Clear the Floor: Take a few minutes to clear the area of any cords, toys, or other obstacles before you begin cleaning. This simple step can keep many problems at bay and help ensure that the cleaning process goes smoothly.
Use Cord Organizers: Organize and secure longer cords to keep them off the floor and out of the vacuum’s path. Cord organizers can help manage cable clutter and keep your vacuum safe.
Utilize Virtual Boundaries: Use magnetic strips or virtual boundaries to restrict the vacuum’s access to areas prone to such obstacles. These tools can help guide your vacuum and prevent it from getting stuck.
5. Navigating Thick Carpets and Rugs
Thick carpets, shaggy rugs, and bathroom mats can pose a significant challenge for robot vacuums. These surfaces can cause the vacuum to get stuck or struggle to move.
Solution:
Block Off Challenging Areas: If certain rugs or carpets consistently cause issues, consider blocking off these areas using virtual boundaries or physical barriers. This can help your vacuum avoid problematic surfaces and focus on easier-to-navigate areas.
Manual Cleaning: For particularly problematic areas, it might be best to clean them manually. While robot vacuums are convenient, some surfaces may still require traditional vacuuming.
Check Specifications: Ensure your robot vacuum is designed to handle high-pile carpets. Some models are better equipped for this task than others, so choose a vacuum that matches your home’s flooring types.
The Narwal Flow, with its CarpetFocus™ technology, automatically lowers its brush cover to create a sealed airflow zone, doubling dirt pickup power, and lifts its mop by 12mm to keep carpets dry. This ensures your carpets get deep-cleaned without extra effort.
6. Low Furniture and Tight Spaces

Robot vacuums can get stuck under low furniture or in tight spaces where they cannot maneuver easily. These areas can trap the vacuum and interrupt its cleaning session.
Solution:
Increase Clearance: Use furniture risers to increase the clearance under low furniture. This can provide enough space for the vacuum to navigate without getting stuck.
Use Virtual Boundaries: Place virtual boundary strips to restrict the vacuum’s access to these problematic areas. This can prevent the vacuum from entering spaces where it might get trapped.
Rearrange Furniture: If possible, rearrange furniture to create more space for the vacuum to navigate. Ensuring clear paths can significantly improve the vacuum’s efficiency and prevent it from getting stuck.
7. Firmware and Software Issues
Outdated firmware or software can cause operational glitches, including navigation errors and unexpected stops. Keeping the vacuum’s software up to date is essential for optimal performance.
Solution:
Regular Updates: Regularly check for and install updates through the vacuum’s companion app. Modernizing usually includes improvements and bug fixes that can enhance performance.
Factory Reset: In the event that the problem persists, attempt to perform a Restore Factory Settings following the manufacturer's instructions. This can resolve persistent software glitches and restore the vacuum to its original settings.
8. Environmental Factors
Poor lighting can confuse some robot vacuums, especially older models that rely on infrared navigation. This will cause them to get lost and stop.
Solution:
Ensure Adequate Lighting: Make sure there is enough ambient light during cleaning sessions to help the vacuum navigate. Proper lighting can enhance a vacuum cleaner's ability to detect and avoid obstacles.
Upgrade Models: Consider upgrading to a model with advanced navigation technology, such as LiDAR, which is less affected by lighting conditions. These models can navigate effectively even in low-light environments.
9. Overheating
Overheating can cause a robot vacuum to stop as a protective measure to prevent damage. This issue can be due to prolonged use, blockages, or other internal problems.
Solution:
Check for Blockages: Ensure that filters and airflow pathways are clear to prevent overheating. Clogging can restrict airflow and cause the vacuum cleaner to overheat.
Allow Cooling Time: If the vacuum stops and feels warm, let it cool down before restarting. Avoid running the vacuum for extended periods without breaks to prevent overheating.
Regular Maintenance: Keep the vacuum’s internal components clean and well-maintained to ensure proper airflow and prevent overheating.
Advanced models like the Narwal Flow are designed with AI-adaptive base stations that handle real-time mop cleaning, warm water rinsing, and hot air drying, reducing manual maintenance and preventing performance drops from overheating or dirt buildup.
How to prevent the vacuum cleaner robot from getting stuck and extend its service life?

To ensure your robot vacuum runs smoothly, follow these troubleshooting tips:
1. Check Battery Levels and Charging
Ensure Full Charge: Always ensure the robot vacuum is properly charged before starting a cleaning session. Use the companion app to monitor battery health and charge status.
Battery Replacement: If the vacuum no longer holds a charge effectively, consider replacing the battery to improve performance.
2. Inspect and Clean Sensors
Regular Cleaning: Periodically wipe the sensor with a soft, clean dry cloth to remove any dust or debris. Clean sensors are crucial for accurate navigation.
Test Sensors: Use the companion app to test sensor functionality and ensure they are working correctly.
3. Clear the Brushes and Suction
Turn Off and Clean: Turn off the vacuum and use a small tool to untangle any hair or fibers from the brushes. Clear any clogs in the suction system.
Regular Maintenance: Schedule regular maintenance sessions to keep these components clean and functional.
4. Software/Firmware Updates
Regular Updates: Regularly check for updates through the companion app and install them. Updates usually consist of performance improvements and bug fixes.
Restore Factory Settings: In the event that the problem persists, try performing a factory reset to resolve the software glitch.
5. Proper Placement of Charging Dock
Optimal Placement: Position the charging dock in an open, centralized area with sufficient space for docking and undocking. Keep the surface level to prevent any instability. Keep the vacuum cleaner in a cool, dry place when not in use. This aids in maintaining its condition and prevents damage caused by environmental factors.
Accessibility: Make sure the vacuum can easily return to the dock when needed for recharging.
6. Regular Maintenance Schedule
Establish Routine: Establish a routine for cleaning filters, brushes, and sensors. Keeping up with regular maintenance encourages problem prevention and ensures smooth operation.
Preventive Maintenance: Active maintenance can extend the life of the vacuum cleaner and improve its performance.
7. Take Care of the Battery Health
Regular Charging: Charge the vacuum at regular times each day and avoid letting the battery fully die before recharging. The appropriate battery maintenance will prolong the service life of the vacuum cleaner.
Monitor Battery Health: Use the companion app to monitor battery health and replace the battery if necessary.

Robot Vacuum Models That Won’t Get Stuck
One of the best ways to avoid constant troubleshooting is to choose a robot vacuum designed to prevent common “stuck” and “stopping” problems. The models below integrate navigation, suction, and self-maintenance technologies that directly address the reasons why many vacuums get stuck.
Narwal Freo Z Ultra
If tangled brushes, blocked sensors, or poor navigation often cause interruptions, the Narwal Freo Z Ultra is designed to minimize those risks.
-
AI Obstacle Avoidance: Dual RGB cameras and AI chips recognize 120+ objects, helping the vacuum avoid cables, pet bowls, and low furniture legs.
-
Adaptive Cleaning Logic: Detects dust vs. liquid and switches modes automatically, preventing dirt from spreading and ensuring continuous cleaning.
-
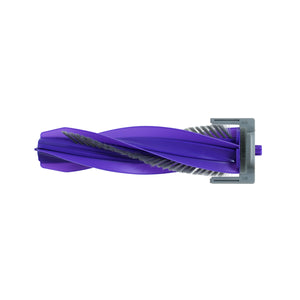
Zero-Tangle Floating Brush: Certified to keep hair from wrapping around the brush, solving one of the most common “stop mid-clean” problems in pet homes.
-
Self-Cleaning Base Station: Automatically washes and dries mops, empties dust for up to 120 days, and prevents clogs and odors that often cause vacuums to stop.
[cta:narwal-freo-z-ultra-robot-vacuum-mop]
Narwal Freo Z10
For homes where hair tangling and dirty corners are common obstacles, the Narwal Freo Z10 provides targeted solutions.
-
Bionic Hand-Scrubbing Mop: Triangular pads with 8N pressure extend dynamically to clean edges and corners where vacuums usually get stuck.
-
Zero-Tangle DualFlow System: Dynamic side brushes and a floating brush guide hair into the dustbin, keeping the rollers clog-free.
-
Dirtsense 3.0: Detects heavily soiled areas and repeats cleaning until the mess is gone, reducing interruptions where traditional vacuums would stop.
-
6-in-1 Base Station: Automatically washes mops with hot water, dries them, and compresses dust—removing common maintenance issues that lead to downtime.
[cta:narwal-freo-z10-robot-vacuum-mop]
Narwal Flow
Many vacuums struggle with carpets, hair tangling, or spreading dirty water. The Narwal Flow is designed to overcome these challenges.
-
FlowWash Self-Cleaning Mop: Keeps mop pads clean with warm water and scraping during every pass, preventing dirt buildup that could halt cleaning.
-
CarpetFocus Technology: Automatically boosts suction by 182% and lifts the mop by 12mm to keep carpets dry—reducing one of the biggest causes of vacuums stalling on rugs.
-
DualFlow Tangle-Free Design: Certified 0% hair tangling rate, ensuring long runs without manual untangling.
-
AI Obstacle Detection: Dual RGB cameras and AI chip identify 200+ objects, helping the vacuum smoothly navigate clutter without getting trapped.
[cta:flow-robot-vacuum-and-mop]
Other Options
Other brands also provide solutions to reduce “getting stuck”:
-
iRobot Roomba j7+: Uses PrecisionVision navigation to detect cords and pet waste, avoiding sudden stops.
-
Roborock S8 Pro Ultra: With DuoRoller brushes and mop lifting, it reduces tangling and rug issues.
-
Ecovacs Deebot X2 Omni: Features AI obstacle recognition and a compact docking station to automate maintenance.

Ending Note: Say Goodbye to Stuck Robot Vacuums
Most robot vacuum problems—like stopping mid-clean or getting stuck—can be solved with regular care and the right technology. Advanced models such as the Narwal Flow are built to prevent these issues, featuring 22,000 Pa suction, FlowWash self-cleaning, and DualFlow tangle-free design. By combining simple maintenance with reliable innovations from brands like Narwal, you can enjoy uninterrupted cleaning and a truly hassle-free experience.
FAQs
Why does my robot vacuum keep stopping?
The most common reasons are low battery, tangled brushes, or dirty sensors. Regular cleaning and battery checks usually solve the problem.
Should you run a robot vacuum every day?
Running a robot vacuum daily is fine, but ensure it has time to fully charge and is regularly maintained. With advanced models like the Narwal Flow, which performs real-time mop self-cleaning and automatic dust collection, running it every day becomes effortless and worry-free.
How often should I update the firmware and software?
Inspect for updates regularly through the companion app and install updates when they become available to ensure optimal performance.
Do robot vacuums fall down stairs?
No. Modern robot vacuums use cliff sensors to detect stairs and edges, preventing falls. If your robot stops near stairs, clean the underside sensors regularly to keep them working properly.


