Battery draining too fast? Robot won’t charge? Many users struggle with charging their robot vacuum properly — leading to poor runtime, shorter battery life, and unexpected downtime. A survey by Consumer Reports shows that over 40% of owners face charging issues within the first year, often due to setup mistakes or lack of maintenance.
In this guide, you’ll learn how to charge different types of robot vacuums, step-by-step instructions, battery care tips, and troubleshooting fixes. We’ll also show how smart models like Narwal Flow and Freo Z Ultra make charging seamless with automatic docking and maintenance-free stations.
Robot Vacuum Charging Explained
Most robot vacuums use rechargeable lithium-ion batteries and a built-in charging system that connects to a dock or adapter. When the vacuum finishes cleaning or the battery runs low, it automatically returns to its dock. The charging contacts on the vacuum and dock transfer power to recharge the battery.
Charging process: Once docked, the vacuum’s power management system regulates the current and stops charging when the battery reaches full capacity. This prevents overcharging and helps maintain long-term battery health.
Factors that affect charging:
-
Battery size: Larger batteries (like those in high-end models) take longer to charge but last longer per session.
-
Dock placement: Keep the dock on a flat, unobstructed surface so the robot can align and charge properly.
-
Room temperature: Extreme heat or cold can slow charging or reduce battery lifespan.
-
Contact cleanliness: Dust or residue on charging pins can interrupt the connection; wipe them regularly.
Want Smarter, Easier Charging? Consider Narwal
Today’s advanced robot vacuums, including the Narwal series, are designed for automatic and smart robot vacuum charging. This means you do not need to manually intervene after each use. The process of charging robot vacuum cleaners is now more seamless, ensuring the device returns to full power reliably after each cleaning session.
Automatic Docking and Smart Charging
Unlike basic models that require manual charging, Narwal Freo Z Ultra automatically docks and recharges, ensuring zero user effort. When the battery is low, the vacuum goes back to its dock to recharge itself. This intelligent system ensures seamless docking, optimizing power management to prevent overcharging and keeping the battery in peak condition.
[cta:narwal-freo-z-ultra-robot-vacuum-mop]
Power management
The base station provides a rated power of 65W and charges at 40W, ensuring efficient and relatively fast charging without overloading the battery, reducing downtime between cleaning cycles.

Battery life
The robot is equipped with a 5000mAh rechargeable lithium-ion battery, which supports long cleaning before it needs to be recharged. Lithium-ion batteries are durable, and the power supply controlled by the base station helps to maintain the battery health and avoid overcharging, which can wear out the battery.
Versatile Base Station
In addition to charging, the base station also handles other maintenance tasks such as water heating, dust collection, and drying. This reduces manual maintenance and keeps the robot in optimal operating condition.
How to Charge a Robot Vacuum (Step-by-Step Guide)
Whether you are searching for information on how to charge robot battery or looking up the best way for vacuum cleaner charging, understanding your model’s requirements is key. Charging robot vacuum cleaners the right way maximizes cleaning performance and battery longevity.
Robot Vacuum Charging Comparison
|
Model Type |
Charging Method |
Full Charging Time |
Manual Intervention Needed? |
Extra Features |
|
Basic Models (Manual Docking) |
Plug the charger directly into the vacuum |
2–4 hours |
Yes – user must power off, connect charger, and unplug |
None – charging only |
|
Mid-Range Models (Auto Docking) |
Auto-return to charging dock |
3–5 hours |
Minimal – needs clean contacts and proper dock placement |
Basic automation (self-docking, app/manual return) |
|
High-End Models (Smart Docking) |
Intelligent docking station manages charging |
4–6 hours |
No – fully automatic once dock is set up |
Dock may handle mop washing, hot air drying, dust collection, app integration |
Basic Models (Manual Docking)
These models require you to manually connect the vacuum to the charger. They are the simplest models and don't come with docking stations. If you're using a basic robot vacuum, here's how to charge it:

Steps:
- Power Off the Vacuum: Before connecting to the charger, always power off the vacuum to ensure safe charging. This prevents any issues with the charging cycle and preserves the battery’s health.
- Locate the Charging Socket: Find the charging port on the vacuum cleaner. Typically, it is located either on the side or at the bottom of the device, depending on its design.
- Plug in the Charger: Attach the charger to the vacuum’s charging port, ensuring a secure connection.
- Plug into a Power Source: Insert the charger into an electrical outlet. Look for a light on the vacuum or charger to confirm that it is connected and charging.
- Leave the Vacuum to Charge Fully: Let the vacuum charge for the recommended time stated in the user manual (typically 2-4 hours). Avoid unplugging it before the battery is fully charged, as partial charges can reduce the battery life over time.
Pro Tip: Always charge the vacuum after each use. Even if the battery isn’t fully drained, topping it off ensures it's ready for the next cleaning session. This practice helps maintain consistent battery health.
Mid-Range Models (Automatic Docking)
For mid-tier robot vacuum users, vacuum cleaner charging becomes easier because these models can automatically locate their docking station. Users often search for “charging robot vacuum cleaner” because they want to ensure their device is correctly positioned to dock and recharge for the next cleaning cycle.

Steps:
- Position the Dock: Place the charging dock in an open space, away from clutter, walls, and furniture. The dock needs a flat, stable surface. Ensure there is about 1.5-2 feet of space on each side and at least 4 feet in front of the dock so the vacuum can approach it without obstacles.
- Power On the Vacuum: Ensure your vacuum stays on so it can sense a low battery and dock itself automatically.
- Let the Vacuum Find the Dock:

Once the vacuum has finished cleaning or its battery drops below a certain level (usually 20%), it will search for the dock. You can also manually send it to the dock via the remote control or app, if available.
- Ensure Proper Contact: Check that the vacuum is correctly aligned with the dock’s charging pins. The vacuum needs to fit snugly on the dock to begin charging. Some vacuums have an indicator light or sound to confirm that they are properly docked.
- Allow Full Charging: Let the vacuum fully charge. Mid-range models usually require 3 to 5 hours for a full recharge, varying with battery capacity.
Pro Tip: Make it a habit to keep the charging contacts on the dock and vacuum clean. Accumulated dust and debris can disrupt charging and affect docking performance.
High-End Models (Smart Charging)
High-end models, like the Narwal Freo Z Ultra, offer the most advanced charging features. These vacuums don’t just charge themselves — they also clean, dry, and empty their dustbins, reducing manual intervention to a minimum.

Steps:
Set Up the Docking Station:
Set up the docking station in an area with good airflow. This is crucial because the dock doesn’t just charge the vacuum—it may also handle functions like drying the mop or self-emptying the dustbin. Ensure there’s plenty of space around the dock—at least 2 feet on each side and 5 feet in front—for smooth docking.
Ensure a Strong Wi-Fi Connection:
High-end models often rely on a Wi-Fi connection for optimal performance. Check that the dock is placed within range of your home’s Wi-Fi network. This will allow smart features like real-time cleaning and charging updates through the app.
Monitor the Charging Process:
The vacuum will head back to its dock once the battery runs low or after it has completed a cleaning session. You don’t need to manually intervene unless the vacuum is having trouble docking (which can happen if the dock is in a hard-to-reach area).
Let the Dock Handle Everything:
Once docked, the station will handle charging, cleaning, and drying. If the model includes a self-cleaning feature (like the Narwal Freo Z Ultra), it will also empty the dustbin into a storage bag. Some models can go up to 120 days without needing manual intervention.
Full Charging Cycle:
High-end models often take 4-6 hours for a full charge due to larger battery sizes and the added functionality of cleaning and drying. Make sure the vacuum completes its full charging cycle before the next use.
Pro Tip: Check the vacuum’s app to monitor charging progress, adjust cleaning schedules, or view maintenance alerts. Keeping the app updated ensures you can make the most out of your vacuum’s smart features.
Smarter Charging with Narwal Flow
For users who want the very latest in automation, Narwal has taken charging convenience one step further with the Narwal Flow.
Not only does it automatically return to its dock when the battery runs low, but the dock itself goes far beyond simple charging. With a maintenance-free station, the Flow can:
-
Recharge efficiently and prepare for the next session.
-
Wash its mop in 176°F hot water, then dry it with warm air to prevent odors.
-
Store dust for up to 120 days, reducing the need for frequent maintenance.
-
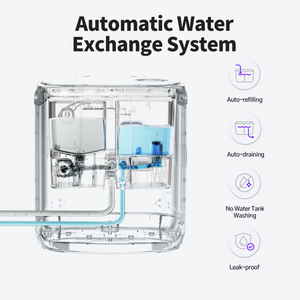
Optionally connect to an auto water refill and drainage system, so you almost never need to touch it.
Powered by a 6400mAh battery with up to 90 minutes runtime, and paired with advanced features like CarpetFocus™ technology and a DualFlow tangle-free system, the Narwal Flow represents the future of hands-free cleaning and charging.
Adhering to these model-specific instructions will help you achieve hassle-free and efficient charging for your robot vacuum. Proper setup and maintenance of the dock will keep your vacuum performing at its best, whether you’re using a basic manual model or a high-tech, fully automated one like the Narwal robot vacuum.
[cta:flow-robot-vacuum-and-mop]
Real-Life Charging Scenarios
While technical instructions are important, real-world experiences often show the real difference between basic, mid-range, and high-end robot vacuums. Here are two everyday situations that highlight how charging methods can impact convenience and peace of mind.
Forgetting to Plug In vs. Automatic Return
“Last year I used a basic robot vacuum that required manual charging. More than once, I forgot to plug it in after cleaning, only to find the battery dead when I needed it most. With a mid-range auto-docking model, this problem disappeared. As soon as the battery runs low, it automatically finds its way back to the dock. Now, the vacuum is always charged and ready for the next session without me having to think about it.”
Automatic docking ensures consistency and reliability, saving users from the frustration of manual charging mistakes.
Households with Pets and Kids
“As parents of two toddlers and owners of a husky, our floors are constantly messy with snack crumbs and dog hair. With a high-end model like the Narwal Freo Z Ultra, we don’t worry about whether the vacuum is charged. It cleans for over an hour, then returns to the dock to recharge and even washes its mop pads automatically. This means less stress during hectic mornings — we never have to remember to plug it in, and the kids can still crawl on clean floors.”
Smart charging combined with self-cleaning features makes a huge difference in busy households, especially with pets or children.
Maintenance Tips for Better Charging
Even the best robot vacuums need occasional care to keep charging smoothly. Here are some quick tips:
1. Clean the Charging Contacts
- Why: Dust, pet hair, or grease can block the connection between the robot and the dock.
- How: Once a week, wipe both the robot’s charging pins and the dock contacts with a dry cloth or cotton swab. For stubborn grime, use a cloth slightly dampened with rubbing alcohol. Always let them dry before charging again.
2. Place the Dock on a Stable Surface
Uneven or shaky surfaces may prevent the robot from aligning with the charging pins. Keep the dock on a flat, stable floor with open space around it.
3. Battery Care Tips
- Regular charging: Keep your robot on the dock when not in use. Modern lithium-ion batteries stop drawing power once full, so this won’t damage them.
- Avoid deep discharges: Try not to let the battery drain completely to 0%. Topping it up regularly helps preserve its capacity.
- Long-term storage: If you won’t use the robot for weeks, fully charge it once, then turn it off and store in a cool, dry place. Recharge every 1–2 months to prevent the battery from dying.
4. Update the App and Firmware
Many charging and battery optimizations come through software. Keeping the app and firmware updated ensures the vacuum manages power efficiently.
Robot Vacuum Not Charging? Quick Troubleshooting Guide
If your robot vacuum isn’t charging, the issue is often simple. Before requesting service, check these common causes:
-
Dirty or dusty charging contacts
-
Dock not connected to power
-
Loose cable or adapter
-
Firmware or app not updated
FAQs about Charging Robot Vacuum
How long does a robot vacuum take to charge?
Most models take 2–6 hours depending on battery capacity and dock design. High-end models like Narwal Freo Z Ultra and Narwal Flow usually recharge in about 4–4.5 hours with smart power control.
How do I charge my robot vacuum for the first time?
Place it on the dock and let it charge fully before use (3–6 hours). Avoid interrupting the first charge to help the battery reach full capacity.
How can I check if my robot vacuum is charging?
Look for the indicator light or check the companion app. If no signal appears, make sure the dock is powered and the contacts are clean.
Should I keep my robot vacuum plugged in all the time?
Yes, it’s fine to leave it docked. Modern lithium-ion batteries stop drawing power once full. For long-term storage, unplug and store it in a cool, dry place.
Can I leave my robot vacuum charging overnight?
Yes, it’s generally safe. Smart docks regulate power automatically, but keep the area ventilated and avoid extreme temperatures.

Never Think About Charging Again
Learning the right way to charge your robot vacuum ensures longer battery life and fewer interruptions. But why stop at “doing it right” when you can let your vacuum take care of charging itself?
With models like the Narwal Flow and Narwal Freo Z Ultra, you get more than just a robot that finds its dock. Their advanced base stations recharge, wash, dry, and even store dust for months at a time — giving you a device that’s always ready without extra effort.
Stop worrying about plugs, ports, or charging schedules. Choose Narwal and enjoy smarter, worry-free charging every day.


