


Mopping seems simple—until you're stuck with streaks, sticky floors, or water damage. If you've ever wondered whether you're using the right tools or mopping too often, this guide is for you.
We'll start with the basics—what you need before you start mopping—and then explain how to mop different floor types without causing damage. You'll get a clear, step-by-step method, learn how to avoid common mistakes, and understand how often to mop different rooms.
Tired of doing it all yourself?
We'll also share a smart, hands-free solution that takes care of it for you.
What You Need Before You Start Mopping?

Before you start mopping, it's important to have the right tools and supplies. That will make the job easier, faster, and much more effective.
Here’s a quick checklist to get you ready:
-
A mop that suits your floor type
-
One or two sturdy buckets
-
A floor-safe cleaning solution
-
Clean water (warm, not hot)
- Optional: gloves, especially if using stronger cleaners
Now let’s go over each item so you know how to choose what works best.
You’ll need a mop, of course—but not just any mop.
A flat mop or spray mop is good for quick daily cleaning.
For a deeper clean, especially in kitchens or entryways, a string mop or spin mop will do a better job.
If your floors have grout lines or texture, like ceramic tile, consider a sponge mop that can get into those grooves.
Next, prepare one or two buckets.
Using two buckets—one for clean rinse water and one for the detergent solution—helps keep dirty water off your floors. It may seem like extra work, but it actually saves time in the long run.
For the cleaning solution, choose something that matches your floor type.
A mild, non-abrasive floor cleaner is safe for most surfaces. Avoid bleach or ammonia unless your flooring specifically allows it. If you have hardwood or laminate floors, make sure to use a product designed for those materials.
Finally, check the floor before you mop. Loose dust, hair, or crumbs should be swept or vacuumed first. Otherwise, your mop will just push that debris around.
A few minutes of prep goes a long way. When you start with the right tools, mopping becomes much more efficient—and your floors will look noticeably cleaner.
How to Mop Different Types of Floors?

When learning how to mop, it’s important to understand that not all floors are cleaned the same way. Each flooring material needs a different approach to stay clean without getting damaged.
In this section, we’ll cover how to mop tile floors, how to mop hardwood floors safely, and what to consider when cleaning laminate, vinyl, or linoleum. That way, you can match your technique to your surface and avoid common mistakes.
How to Mop Tile Floors?
Floors like ceramic or porcelain tile are tough, but that doesn’t mean you can mop them carelessly. The best way to mop tile floors is to use a damp sponge mop or a chamois-style mop. These tools help you get into the grout lines without pushing dirt around.
Mix warm water with a mild mopping detergent. For regular cleaning, that’s enough. If tiles are textured, mop in straight lines to pull dirt out of the grooves.
What you should NOT do:
-
Don’t use vinegar or lemon on marble or slate tiles. These can cause damage.
-
Don’t forget to rinse—soap left behind can leave a dull film.
-
Don’t use too much cleaner. It can build up in grout lines.
How to Mop Hardwood Floors Safely?
Hardwood floors don’t like water. Use a microfiber mop that’s just a little damp. Choose a cleaner made for sealed wood floors.
Avoid steam or wet mops. Water can cause the wood to swell or fade. If you’re unsure about the cleaner, check your floor’s care guide.
Never use vinegar or bleach. These can damage the finish. Use light moisture and mild products. That’s the safest way to mop hardwood floors.
What you should NOT do:
-
Don’t leave water sitting on wood floors.
-
Don’t use strong chemicals like bleach or vinegar.
-
Don’t scrub against the wood grain or with hard brushes.
How to Mop Laminate Floors?
Laminate floors look like wood but can’t handle water well. The top layer is thin and can bubble if too wet.
Use a microfiber mop that’s only slightly damp. Clean small sections at a time to avoid leaving puddles. Use only cleaners marked safe for laminate.
Avoid scrub brushes. They can scratch the surface and make it look old.
What you should NOT do:
-
Don’t use a wet mop or let water sit.
-
Don’t use regular cleaners that aren’t for laminate.
- Don’t use sponge mops—they hold too much water.
How to Mop Vinyl and Linoleum Floors?
These floors handle water better but still need the right care. A string mop or sponge mop works well. For everyday cleaning, use warm water or a mild solution.
For deeper cleaning, choose a non-abrasive product. Always rinse after mopping to avoid sticky residue.
Linoleum is more sensitive than vinyl. Don’t soak it, and dry it right away.
What you should NOT do:
-
Don’t use steam or hot water on linoleum.
-
Don’t let dirty water sit while mopping.
- Don’t forget to dry the floor after mopping.
Step by Step Guide to Mopping Floors
If you want to master how to mop a floor, understanding the step-by-step process is key. Even if you’ve mopped before, following a proper method can make a big difference in how clean your floors turn out.
This guide will walk you through how to prepare the area, how to apply the cleaning solution, how to mop in the right direction, and finally, how to rinse and dry the floor properly. Each step helps prevent damage and makes the job easier.
1. Prepare the Area Before Mopping
Before you touch the mop, take a moment to get your floor ready. This step makes sure you’re not just moving dirt around.
Start by removing loose objects like rugs, chairs, or floor baskets. Next, sweep or vacuum the entire floor to get rid of dust, hair, and crumbs. If you skip this, your mop may leave streaks or pick up debris that scratches the surface.
If there are sticky spots—like juice spills or dried mud—wipe them with a damp cloth or sponge first. That way, your mop won’t get overloaded in the first few minutes.
Tip: Don’t rush this part. A clean surface gives you the best chance of success when you start the actual mopping.
2. Apply Cleaning Solution Correctly
The next step is to prepare and apply your mopping solution. Use a cleaner that matches your floor type—wood, tile, laminate, or vinyl. Always follow the directions on the label for how much to mix with water.
Use warm, not hot, water in your bucket. If you're using two buckets, one should hold the cleaning mix, and the other should be for rinse water only.
Dip your mop into the solution and wring it out well. It should be damp, not dripping wet. Too much water can damage some floor types and leave behind puddles or streaks.
Tip: Less is more when it comes to cleaning. Using too much soap may leave a sticky film.
3. Mop in the Right Direction and Pattern
Once your mop is ready, it’s time to clean. The best way to mop floors is to move in sections. Start at the far end of the room and work your way toward the door so you don’t step on what you’ve just cleaned.
If you're using a flat or microfiber mop, move in figure-eight patterns for even coverage. For sponge or string mops, straight lines work best.
Overlap each stroke slightly to avoid missing spots. Be patient—rushing can leave dirt behind or make your mop less effective.
Tip: Don’t mop randomly or in circles. A consistent pattern keeps the floor evenly clean and prevents streaks.
4. Rinse and Dry the Floor Properly
After mopping one area, rinse your mop in the clean water bucket. Wring it out completely before moving to the next section. This keeps dirty water off the floor and improves results.
When you're done with the full space, go over the floor once more with plain water. This step removes any leftover cleaner, which could dull the finish if left behind.
Let the floor air dry or use a clean towel to speed things up. Keep windows open if possible for better airflow.
Tip: Wet floors attract dust fast. Make sure people and pets stay out until it’s completely dry.
One-Step Solution for Cleaner Floors

With so many floor types and special cleaning rules, keeping everything spotless can feel like a full-time job. If you're tired of constantly checking for dirt or worrying whether you're using the right method, there's a better way.
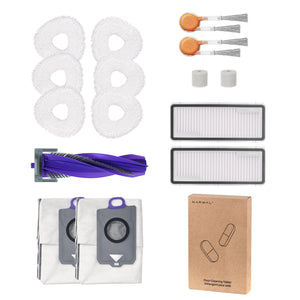
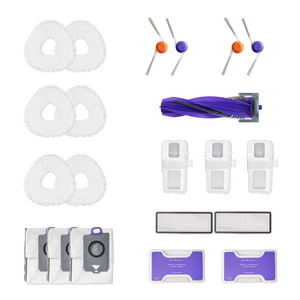
The Narwal robot vacuum and mop offers a true hands-free solution. It automatically detects floor materials and switches modes to clean efficiently—whether it's hardwood, tile, or laminate. You can schedule cleaning times, set cleaning zones, and let it plan the best path through your home.
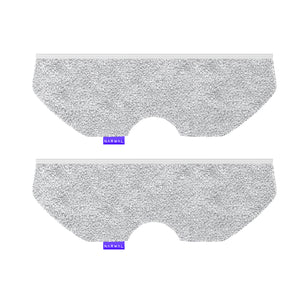
And if you're worried about maintenance, don’t be. Its fully automatic base station takes care of that, too—washing the mop pads to keep them clean for the next round. No more lifting a finger to mop or sweep. Just clean floors, every day, without the hassle.
How to Avoid When Mopping?

Even if you already know how to mop the floor easily, it’s common to overlook small habits that lead to poor results.
In this section, we’ll help you spot three things that can ruin a clean floor: common mopping mistakes, using the wrong products, and sticky residue or streaks that won’t go away.
Most Common Mopping Mistakes
Mopping is simple—but easy to mess up. Most mistakes aren’t about the tools; they’re about how you use them.
-
Mopping large areas too quickly, missing buildup in edges
-
Applying pressure instead of letting the mop do the work
-
Skipping regular rinses during cleaning
-
Using a cleaning solution at full strength when dilution is needed
-
Letting the mop dry out mid-session, reducing pickup ability
These aren’t about what tools you use—but how you use them. Better habits make for better results.
Products You Should Not Use on Floors
Sometimes, the biggest mistake is what you pour into your bucket. Many people assume all cleaners are safe—especially if they smell fresh or say “multi-surface.”
In fact, most general-purpose sprays aren’t ideal for floors. Some leave behind waxy residue, and others are simply too harsh for sensitive surfaces.
-
All-in-one cleaners that aren’t floor-specific
-
Strong-scented products that rely on heavy fragrance, not actual cleaning
-
Wax-based “mop and shine” liquids that build up over time
-
Alcohol-based sprays that evaporate too fast, leaving patches
-
Disinfectants not meant for rinse-free use on sealed surfaces
Want better results? Stick to floor cleaning tips that focus on what your surface needs—not just what smells clean.
How to Prevent Sticky Floors After Mopping?
1. Use less mopping solution—a little goes a long way
2. Always wring your mop thoroughly before applying
3. Change dirty water before it gets cloudy
4. Rinse with plain water after mopping, especially in kitchens
5. Let the floor dry completely before walking on it
Sticky floors are usually the result of buildup. Keeping your routine light and clean helps the floor feel as fresh as it looks.
How to Prevent Streaks on the Floor?
1. Mop small areas at a time so the solution doesn’t dry before wiping
2. Use smooth, even strokes—don’t go back and forth over drying spots
3. Make sure your mop is damp, not dripping
4. Avoid re-wiping already dry areas, which can leave lines
5. Use a fan or open window to help the floor dry evenly
Streak-free floors come from balance: not too wet, not too dry, and not too much product. These floor cleaning tips help get that just-right finish.
How to Clean the Mop After Use?
1. Rinse Immediately
As soon as you finish mopping, rinse the mop head in warm water. This removes any leftover mopping solution or dirt. If you’ve used a mop and bucket system, empty both buckets before the water turns gray or smells bad.
2. Wash Thoroughly
Depending on your mop type:
-
Microfiber heads: Remove and machine wash them with mild detergent. Avoid using fabric softener—it reduces absorbency.
-
String or sponge mops: Soak them in a bucket of hot water and a few drops of bleach or vinegar for 5–10 minutes. Then rinse until the water runs clear.
For daily cleaning, warm water and dish soap are usually enough. For deep cleaning, disinfect once a week.
3. Dry Completely
Wring out the mop and hang it in a well-ventilated area. Never store it damp in a closet or it may grow mold.
Hang it upside down if possible. This helps it dry faster and keeps the mop head from flattening.
4. Clean the Bucket Too
Don’t forget the tools. Rinse out your mop and bucket with clean water and dry them with a towel or let them air-dry. This is one of the most overlooked floor cleaning tips—a dirty bucket just undoes your hard work.
5. Replace When Needed
Even with good care, mop heads wear out. If the fibers look frayed, or it smells even after washing, it’s time to replace it. Regular replacement is part of the best way to mop floors and maintain hygiene.
A clean mop ensures that next time you start with a tool that actually helps—not one that makes things worse. That’s essential when thinking about how to clean floor surfaces properly and safely.
How Often Should You Mop Your Floors?

You should mop most floors once a week—but the ideal frequency depends on how much foot traffic the area gets. For kitchens and bathrooms, twice a week is often better.
In this section, we’ll break it down clearly. You’ll learn about the mopping frequency by room type, plus simple spot cleaning tips between full mops to keep your home feeling fresh.
Mopping Frequency by Room Type
Different rooms collect dirt in different ways. A kitchen floor gets food spills and grease, while a bedroom may stay clean for days. Use this guide to match your routine to your space.
High-traffic areas (2–3 times a week):
- Kitchen
- Entryway or mudroom
- Bathroom
Medium-traffic areas (once a week):
- Living room
- Hallways
- Dining areas
Low-traffic areas (every 2–3 weeks):
- Bedrooms
- Guest rooms
- Home office
If someone in your home has allergies or pets, increase the frequency. Mopping with just water and a microfiber mop between deep cleans can help remove dust and allergens without damaging the floor.
Regular mopping not only keeps things looking clean—it protects your floors from long-term wear.
Spot Cleaning Tips Between Full Mops
Sometimes you don’t need to mop the whole floor—just a small mess. This is where spot cleaning saves time and effort.
Use a damp microfiber cloth or a spray mop for sticky spots or footprints. Always use what’s safe for your floor type, especially on wood or laminate.
Here are simple spot cleaning tips:
-
Wipe up spills immediately to prevent staining
-
Clean sticky areas with a small amount of warm water and a drop of cleaner
-
Avoid scrubbing dry dirt—it can scratch the surface
-
Don’t overuse product; for quick cleans, water is often enough
These easy floor cleaning tips keep your space looking tidy between deep mops. The best way to mop floors is to avoid letting dirt build up in the first place.
Knowing how often to mop floors and when to just spot clean helps you stay in control—without turning cleaning into a full-time job.
Mop Floor in Right Way Without Stress
Learning how to mop the right way can truly transform your cleaning routine. You’ve now got the tools, techniques, and tips to tackle any floor with confidence.
But if you’re still feeling overwhelmed—always watching for footprints, always chasing dust—it’s okay to admit that mopping can be tiring. Clean floors are essential, but they shouldn’t take up all your time.
That’s where Narwal robot vacuums and mops come in.
If you’re ready to stop worrying about when, how, or how often to mop, let Narwal handle the hard part. You’ve learned what works—now choose the smarter way to do it.
FAQs About Mopping Floors
Does Mopping Actually Clean with a Robot Vacuum?
Yes, but it depends on the model and how dirty the floor is.
Most robot vacuums with mopping functions can handle light dust, footprints, or dried spills. However, they may not remove heavy stains or sticky messes as well as manual mopping. But Narwal’s mopping robots can let you enjoy spotless floors.
What Is the Best Thing to Mop Floors With?
A microfiber mop and a pH-neutral floor cleaner are the best combination for most floor types. Narwal robot mop and vacuum can also do the best job for you.
Why Does My House Smell After I Mop?
Your house may smell after mopping because of leftover dirty water or a used mop that wasn’t cleaned properly.
If the mop is full of bacteria or the bucket water isn't changed often, the odor can spread across the floor. To prevent this, rinse your mop frequently and replace the water when it looks cloudy or smells bad.
Why Are My Floors Still Dirty After Mopping?
Floors often stay dirty after mopping because you’re using a dirty mop or not rinsing enough.
If you mop without sweeping first, or reuse dirty water, you're just spreading grime around. Always sweep before you mop, clean in sections, and rinse with fresh water often to avoid streaks and sticky residue.
Can You Mop With Just Water?
Yes, you can mop with just water for light cleaning and dust removal.
Water is safe for most floor types and works well when combined with a microfiber mop. However, for sticky spots or grease, it’s better to use a mild cleaning solution designed for your flooring.
How to Mop Without a Bucket?
You can mop without a bucket by using a spray mop or a pre-moistened mop pad.
Spray mops let you apply solution directly to the floor, then wipe it clean. This method is fast, mess-free, and ideal for small spaces or daily touch-ups—especially when you want to mop the floor easily without hauling water.


