


Cleaning your house shouldn't feel like starting from scratch every time. But without a clear system, it’s easy to waste time, redo work, or give up halfway through. What helps most isn’t working harder. It’s knowing what to do, in what order, and how to make it stick.
This guide gives you that structure. You'll learn how to get ready before you start, follow five essential steps that simplify every task, and clean each room with less effort. We’ll also share time-saving tips, simple routines, and Narwal smart tools that do the work for you.
Preparation Before Your House Cleaning
House cleaning always goes smoother when you're prepared. It’s frustrating to start wiping counters and realize your spray bottle is empty or your vacuum isn't ready.
In this part, we’ll walk through the tools and cleaning products you need, and help you decide the best cleaning order for your space.
Tools and Cleaning Products
Before you begin, gather everything in one place. This saves time and keeps you focused. Start with these basics:
1. Floor tools
-
A vacuum cleaner for carpets and rugs
-
A broom and dustpan for hard floors
-
A mop and bucket for deep floor cleaning
-
A robot vacuum if you want to save all time on daily dust
2. Wiping and dusting tools
-
Microfiber cloths (for dusting, wiping surfaces, and mirrors)
-
A sponge or scrub pad for tough spots
-
A squeegee for glass or shower walls
3. Cleaning products
-
All-purpose cleaner for counters, walls, and sinks
-
Dish soap for greasy spots or small surfaces
-
Glass cleaner for windows and mirrors
-
Disinfectant spray or wipes for high-touch areas
-
Grout or bathroom cleaner if you have tiled areas
4. Natural boosters
-
Baking soda for deodorizing and scrubbing
-
White vinegar for natural disinfecting and breaking down grime
-
Lemon juice for fresh scent and mild acid cleaning
5. Optional items
-
Latex or rubber gloves if using stronger chemicals
- A caddy or basket to carry your tools around
Decide Your Cleaning Order
Before you start, it’s important to follow one basic rule of cleaning: clean from top to bottom, and from dry to wet. This helps you avoid extra work.
Let gravity work in your favor—cleaning top surfaces first, then moving downward. Start with dry tasks like dusting, sweeping, or vacuuming. Then move on to wet tasks like wiping with cleaner or mopping.
Once you understand the basic flow, decide how you want to move through your home. Here are two simple ways:
1. Room-by-room cleaning
Clean one full room at a time, following the top-to-bottom and dry-to-wet rule inside that space. This method works well if you need to focus or take breaks between rooms.
2. Task-by-task cleaning
Do the same task in every room before moving on to the next. For example, dust all rooms first, then vacuum all floors. This works best if your home is open-plan or you want to move quickly.
There’s no perfect method for everyone. What matters most is being consistent. Stick with one order each time, and you’ll find your routine becomes easier and faster.
How to Clean Your House? 5 Basic Steps

To clean your house properly, follow five clear steps that work in any space. Start with decluttering, then dust, vacuum or sweep, wipe surfaces, and finally mop or disinfect. This is the most effective way to stay organized and avoid doing the same work twice.
These steps form the core of any house cleaning checklist. Whether you’re deep cleaning or just keeping up with the mess, this method is a reliable answer to how to clean your house.
1. Declutter
Start by removing anything that doesn’t belong. Use two bags—one for trash, one for donations. Don’t pause to overthink; if you haven’t used it in months, it’s clutter. Focus on open areas, counters, floors, and surfaces where you'll be wiping or vacuuming.Group similar items together: books on shelves, clothes in closets, toys in bins. Stack, fold, or store efficiently to reduce visual mess. This step clears the way for faster cleaning.
Tips:
If you often struggle with what to keep or toss, create a “maybe” box. Store items you’re unsure about in it, seal it, and set a reminder for a few months later. If you haven’t needed anything inside by then, it’s likely safe to let them go.
2. Dust
Dust from top to bottom, dry to damp. Start with ceiling corners, shelves, fan blades, and move down to tables and baseboards. Use a microfiber cloth or duster; attach it to a broom handle for high areas. For blinds, close them one direction, dust, then reverse.
Wipe electronics with a dry cloth or screen-safe cleaner. Dust frames, switches, vents, and other missed spots. Avoid cleaning the same area twice by following a pattern.
3. Vacuum or Sweep
After dusting, clean the floors to remove fallen particles and deeper dirt. Use a vacuum for carpets, rugs, or pet hair. Use a broom for hard floors like wood or tile. Go slowly in long, straight lines to avoid missing spots.
Don’t skip corners, under furniture, or baseboards. For best results, vacuum in two directions—especially on fabric or high-traffic areas.
If you’re using a robot vacuum, run it while you clean other surfaces to save time. If you have a Narwal robot vacuum, you can skip this step of floor(including mopping) cleaning entirely.
4. Wipe Surfaces
Work from the cleanest areas to the dirtiest ones. Start with areas that are touched often, such as doorknobs, light switches, cabinet handles, tables, and counters. Then move to larger surfaces like shelves, window ledges, and any flat spaces that collect dust or fingerprints.
Rinse or switch cloths frequently to avoid spreading grime from one surface to another. Stick to a left-to-right or top-to-bottom motion for full coverage and to avoid missing spots.
Remember use the right cleaning products based on the surface:
- All-purpose cleaner for tables, counters, shelves, and other general surfaces.
- Disinfectant spray or wipe for high-touch areas like doorknobs, light switches, and handles.
- For greasy spots, especially in kitchens, mix a few drops of dish soap with warm water and wipe with a sponge or cloth.
-
Clean electronics with a lightly damp microfiber cloth.
Never spray directly on screens, and avoid using high-concentration alcohol, which can damage the protective coating.
Tips:
Use baking soda for scrubbing sticky stains, grease, or dried spills on hard surfaces. Sprinkle, add a few drops of water, and scrub.
Use white vinegar to break down soap scum, water spots, or odors. Spray directly, wait 3–5 minutes, then wipe with a clean cloth.
5. Mop or Disinfect
Mop from in the farthest corner and move toward the door to avoid stepping on clean areas. Use warm water and a floor-safe cleaner. Rinse the mop often to prevent spreading dirt. For quick jobs, a spray mop is efficient.
In bathrooms, kitchens, and entryways, use disinfectant instead. Spray the surface and let it sit for a few minutes before wiping. This helps remove germs in high-traffic or damp zones.
House Cleaning Checklist by Room

Now that you know the basic steps, it’s time to follow a room-by-room house cleaning checklist. Each area in your home has its own needs.
We'll walk through what to do in each area: kitchen cleaning for grease and dishes, bathroom cleaning for sinks and showers, and bedroom cleaning to refresh your personal space. We’ll also cover shared areas like the living room and those easy-to-miss entryways.
Kitchen Cleaning
Forget wiping everything in order. Cleaning the kitchen from these three greasiest trouble spots and save your energy where it counts.
1. The sink
It’s not just where dishes go. It's where grime builds fastest. Scrub the basin with baking soda and a drop of dish soap. Focus around the drain and rim. Rinse with hot water, then pour a cup of white vinegar to cut odors.
2. The stove area
Burner grates, knobs, backsplash—they trap oil even if you don’t cook much. Spray with warm water and dish soap. Wait a few minutes before wiping. A dry cloth won't do much without that short soak.
3. High-touch surfaces
Fridge handles, cabinet pulls, microwave buttons. Wipe them with a damp cloth and disinfectant. This takes 2 minutes and makes the kitchen feel cleaner instantly.
Quick win: Leave the floor for last. One quick sweep and a mop with warm water clears everything that fell from above.
Leave the floor for last. One quick sweep and a mop with warm water clears everything that fell from above.
Bathroom Cleaning
Bathrooms look clean quickly—but real grime hides in three places most people rush past.
1. The toilet base and flush handle
Everyone cleans the bowl. Few remember the base or behind it. Wipe with disinfectant wipes. Scrub the floor edge with a small brush once a week. For the flush handle, spray and let it sit 5 minutes before wiping. That’s how long disinfectants actually need to work.
2. Shower corners and grout
Soap scum and mold build where tiles meet. Spray these spots with a bathroom cleaner or vinegar. Let it sit for 10 minutes before scrubbing. A toothbrush works better than a sponge here.
3. Sink faucet and drain
Toothpaste splash, limescale, and biofilm collect fast. Scrub with baking soda and hot water. Rinse, then wipe dry. That dry step helps prevent buildup between deep cleans.
You can keep a microfiber cloth in the bathroom and wipe mirrors and counters after every use. No streaks, no buildup.
Bedroom Cleaning
Keep flat surfaces clear and avoid chair piles. Clean bedrooms are more about habits than hard scrubbing.
1. Under the bed
Dust and hair collect fast. Use a vacuum with a crevice tool or a long duster. If possible, raise the bed frame slightly to make cleaning easier.
2. The mattress and bedding
To reduce dust mites, place your mattress and pillows in direct sunlight for a few hours every few months. Rotate the mattress when you do. Wash all bedding weekly in hot water to keep allergens low.
3. Closet and wardrobe
Season changes are the best time to declutter. Pull everything out, vacuum the bottom and shelves, and wipe with a damp cloth. Store off-season clothes in bins or bags. Place mothballs or cedar blocks in the corners to repel insects and mites.
The Living and Dining Areas Cleaning
These spaces collect invisible mess: skin flakes, crumbs, and dust deep in fabrics. Focus on soft materials, hidden corners, and high-use surfaces.
1. Fabric and rugs
Vacuum area rugs and fabric seats slowly in both directions. For deep cushions, lift and vacuum underneath weekly. Spot-clean food stains with diluted dish soap. If smells linger, air out the cushions outside in sunlight.
2. Coffee tables and side surfaces
Wipe down glass, wood, and metal surfaces with the right cleaner. Use coasters to prevent ring stains and make less work for yourself next time.
3. Remote controls, switches, and knobs
These are some of the dirtiest items in the house. Use disinfectant wipes or spray on a cloth—not directly on the device. Clean them weekly or more often if multiple people use the space daily.
Don’t Forget the Entryway and Hallways
Wipe scuff marks and fingerprints from walls and baseboards regularly to prevent buildup.
Keep the shoe and coat area minimal. Too many items trap dust and smell stale.
Clean trays and hooks monthly and store off-season items elsewhere to reduce clutter.
The cleaner this zone stays, the less dirt you carry into every other room.
Pro Cleaning Tips to Make House Cleaning Easier

House cleaning doesn't always need to be hard work. With the right habits and a few smart systems, you can get better results with less effort.
Methods like the 20/10 rule and the 5x5 cleaning method help you stay on track without burnout. A clear daily, weekly, and monthly routine keeps the mess under control, and a robot vacuum can quietly handle floors while you focus elsewhere.
20/10 Rule for Cleaning
Set a timer for 20 minutes to clean, then take a 10-minute break. Repeat as needed. This method keeps you focused without burning out. Use it for big tasks like full-room resets or backlogged chores.
5x5 Cleaning Method
Pick 5 zones in your home and spend 5 minutes on each.
Focus only on visible mess: dishes in the sink, clothes on the floor, surfaces with dust. Skip what looks fine. The goal is momentum, not perfection. It’s ideal for busy days or quick resets before guests arrive.
Daily Weekly Monthly Cleaning Breakdown
Daily: Dishes, wipe counters, tidy common areas.
Weekly: Vacuum floors, clean bathrooms, change bedding.
Monthly: Deep clean appliances, wash windows, clear out fridge and pantry.
Stick to this cycle to avoid overload. Each layer builds on the last and keeps house cleaning manageable year-round.
Use a Robot Vacuum to Save Time on Floors
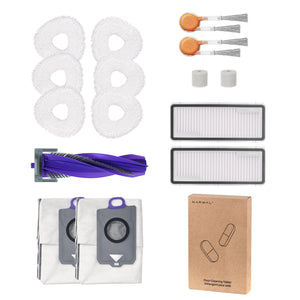
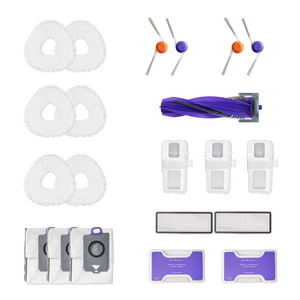
A robot vacuum handles daily dust and debris while you focus on other tasks. It’s most useful in high-traffic areas and under furniture you rarely move. Models like Narwal combine vacuuming and mopping, cutting manual work in half. Run it on a schedule so floors stay clean without extra effort.
FAQs About House Cleaning
How to Clean the Ducts in Your House?
Hire a professional for deep duct cleaning every 3–5 years.
DIY cleaning can help between services. Replace HVAC filters regularly. Vacuum air vents using a hose attachment and dust grilles with a damp cloth. If you notice mold, pests, or visible buildup, it's time for expert help.
How to Motivate Yourself to Clean Your House?
Start small and set a short timer—action builds momentum.
Pick one surface or corner and clean it for 5 minutes. Seeing quick progress often creates the drive to keep going. Music, checklists, or a clear end time can help turn cleaning into a routine instead of a chore.
How to Make Your House Smell Clean?
Ventilate daily and remove odor sources before adding scent.
Open windows when possible. Empty trash, wash textiles, and clean drains. Then use subtle options like baking soda, essential oil diffusers, or vinegar sprays to maintain a fresh, neutral scent without overpowering fragrances.
Should You Mop or Vacuum First?
Always vacuum before mopping.
Vacuuming removes dust, crumbs, and hair. If you mop first, loose debris turns into streaks or mud. Starting dry keeps the wet cleaning step efficient and avoids pushing dirt around.

Rethink House Cleaning and Actually Keep Up
What keeps a home clean isn’t how hard you scrub. It’s how well you manage the work.
Behind every efficient routine is a set of simple truths: clean in a smart order, tackle only what matters, and build small habits that stick.
And when one tool can remove entire steps from that system, it will be essential.
That’s where Narwal fits in. It keeps your floors clean while you’re doing anything else. Vacuuming, mopping, self-cleaning—all handled for you. Quietly, efficiently, consistently.
Let Narwal take a daily task off your hands.


