


If you’ve ever paused mid-cleaning, wondering how to open your vacuum cleaner dust bag without making a dusty mess — you’re not alone. It’s a small task that can quickly turn frustrating if done the wrong way.
In this guide, we’ll walk you through how to open, clean, and replace your vacuum dust bag step by step, using real examples from Narwal’s robot vacuums. You’ll also learn how to tell when it’s time for a replacement and how a few simple habits can keep your vacuum running like new.
How to Open a Vacuum Cleaner Dust Bag?
Step 1. Unplug and Prepare the Vacuum Cleaner
Always start by unplugging your vacuum cleaner to prevent electrical hazards—this is the first safety step for any model.
Next, prepare your space: place an old sheet or newspaper under the vacuum to catch dust or debris.
Tip: If you’ve searched “how to open vacuum cleaner” or “how to open a vacuum cleaner dust bag,” remember that unplugging the device is always the first step, whether you’re using a standard or a robot vacuum cleaner.
Step 2. Locate and Open the Dust Bag Compartment
Find the dust bag compartment. Its location depends on your vacuum model:
-
Upright vacuums: often behind a front panel or under the main body.
-
Canister models: usually on the top or side, opened with clips or latches.
-
Robot vacuum cleaners: the dust bag is typically inside the docking station.
Tip: If you’ve searched how to open a vacuum cleaner or how to open a robot vacuum cleaner, remember that each type has its own access method. Always open the compartment slowly to avoid damage or dust leakage.
Many users look for details on how to open a vacuum cleaner or specifically how to open robot vacuum cleaner models. The main difference lies in the location of the dust bag: traditional vacuums often have easily accessible lids or back panels, while robot vacuum cleaners feature a compartment inside the docking station. Always follow step-by-step instructions so you won’t damage your vacuum cleaner when opening the dust bag compartment.
Step 3. Remove the Dust Bag Properly
Once the compartment is open, gently remove the dust bag. Hold the bag by its collar or cardboard edge and pull it out slowly to avoid spilling dust.
Tip: When learning how to open a vacuum cleaner dust bag, always remove it gently—this applies to both standard vacuums and robot vacuum cleaners. Careful handling keeps the area clean and prevents dust from escaping.
How to Empty or Clean a Vacuum Dust Bag (Reusable Bags)
If your vacuum bag is reusable, you can empty it to extend its use. The key is to handle the dust carefully to avoid mess and damage.
Start by gently shaking the bag over a trash bin. Do this slowly to prevent dust from spreading in the air. Tapping the sides of the bag can help loosen dirt stuck inside. Take your time, especially if the bag has been used for a long time
For stubborn dust, use a soft brush to clean inside the bag. Focus on the corners and seams where dust often collects. Be gentle during this process because too much pressure can damage the bag.
If your vacuum’s manual allows it, you can rinse the bag with warm water. Add a small amount of mild detergent to remove fine dust. Avoid scrubbing hard. After rinsing, let the bag air-dry completely. Never reinstall a damp bag because this can cause mold or damage the vacuum.
This method is only for washable bags. Disposable bags are designed for one-time use and should not be emptied or reused. Always check your vacuum’s manual before cleaning the bag to make sure it is safe to do so.
How to Change a Narwal Vacuum Cleaner Dust Bag?
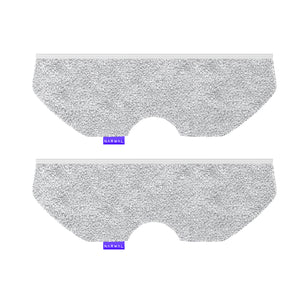
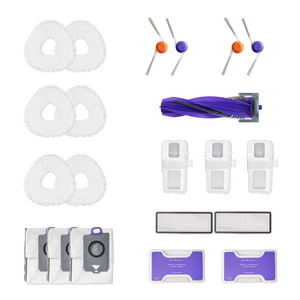
This guide uses the Narwal Z Ultra as an example. Its dust bag has a 2.5-liter capacity and includes an activated carbon layer to help reduce odors. Follow these simple steps to change the dust bag correctly:
[cta:narwal-freo-z-ultra-robot-vacuum-mop]

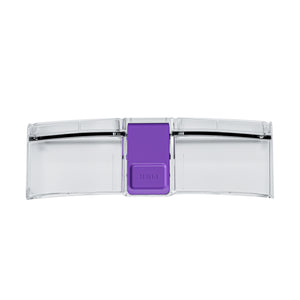
Step 1. Remove the Front Cover of the Base Station
Find the magnetic front cover on the base station. Gently pull it open or press the latch, depending on your model, to remove the cover and expose the dust bag inside.

Step 2. Take Out the Old Dust Bag
Locate the purple pull tab at the top of the dust bag. Pull the tab in the direction indicated by the arrow. This will release the dust bag from its slot. Remove the bag and discard it properly.

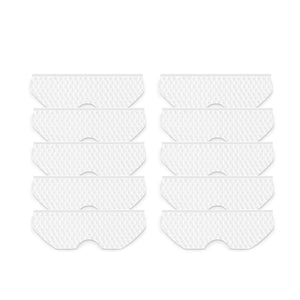
Step 3. Install the New Dust Bag
Take a new dust bag and insert it into the slot. Make sure it is facing the correct direction. Push it down firmly until it is fully seated and locked into place.

Step 4. Reattach the Front Cover
Align the front cover with its original position. Gently press it back onto the base station until it clicks securely into place.
Before replacing the dust bag, always ensure that the robot is turned off to prevent accidental activation. For the best fit and performance, it is recommended to purchase dust bags directly from Narwal’s official website.
If you are unsure about any step, you can watch the official tutorial video on Narwal’s website for visual guidance.
Newer models like the Narwal Flow go beyond simple replacement. With its 120-day dust storage system and automated base station, Flow reduces how often you need to access or change the dust bag manually. This design ensures that users spend less time on upkeep while still maintaining top cleaning performance.
[cta:flow-robot-vacuum-and-mop]
How to Tell If Your Vacuum Cleaner Bag Needs Replacing or Cleaning?
You don’t need advanced tools to know when it’s time to replace or clean your vacuum bag. Watch for these clear signs:
-
Reduced Suction Power
If your vacuum isn’t picking up dirt as well as before, the dust bag may be too full or clogged. A full bag blocks airflow, making the suction weak. When you notice poor cleaning results, check the dust bag first.
Tip: If you’re not sure when to open a vacuum cleaner dust bag, look for clear signs—weak suction, unusual noises, or dust leaking inside the compartment. At this point, open your vacuum cleaner, inspect the dust bag, and replace it if needed. For both standard and robot vacuum cleaners, regular bag checks keep airflow strong and performance consistent.
-
Overheating or Unusual Noises
When the vacuum has to work harder because of a full or blocked dust bag, the motor may overheat. You might also hear strange or louder noises during use. These are clear warnings that the bag needs attention.
-
Dust Leakage or Visible Damage
Check for dust leaking around the bag or inside the compartment. Also, look for tears or holes in the bag itself. Even small damage can reduce the vacuum’s performance and release dust back into the air.
-
Fullness Indicators or Bag Bulging
Some vacuums have an indicator light that shows when the bag is full. If your model doesn’t have this feature, simply open the compartment and inspect the bag. If it looks swollen or hard to the touch, it’s time to replace or empty it.
Common Mistakes When Opening or Replacing Vacuum Bags
Changing a vacuum dust bag may seem easy, but some common mistakes can reduce your vacuum’s performance. Here’s what to avoid:
-
Using the Wrong Type or Size of Dust Bag
Not all dust bags fit every vacuum. Using the wrong size or type can cause leaks, weak suction, or even damage. Always check your vacuum’s manual and use the correct, compatible bag.
When figuring out how to open a vacuum cleaner dust bag, avoid forcing the compartment open or skipping the manual instructions. Using the wrong approach can damage the latch or cover. For robot vacuum cleaners, the process is slightly different since most models store the dust bag in the docking station—so follow the manufacturer’s guide closely when opening and replacing the bag.
-
Waiting Too Long to Replace the Bag
Many people wait until the bag is full. This is a mistake. A full bag reduces suction and forces the motor to work harder, which can cause overheating. It’s best to replace the bag when it’s about two-thirds full or when you notice a drop in performance.
-
Not Checking or Cleaning the Dust Bag Compartment
Dust and debris often collect around the bag compartment. If you skip cleaning this area, leftover dirt can block airflow or cause odors. Take a minute to wipe it clean every time you change the bag.
-
Improperly Sealing or Placing the New Bag
Failing to secure the new dust bag properly can lead to leaks or the bag coming loose during use. Make sure the bag is fully inserted and locked in place before closing the compartment.
Tips to Make Vacuum Cleaner Dust Bags Last Longer
You can extend the life of your vacuum dust bags with a few simple habits. This not only saves money but also keeps your vacuum working well.
Start by changing the bag before it gets too full. Waiting too long will reduce suction and strain the motor. A good rule is to replace the bag when it’s about two-thirds full. This keeps your vacuum running smoothly and helps the bag last as long as possible.
Keep the dust bag compartment clean. Dust often builds up around the bag, which can block airflow and shorten the life of the new bag. Each time you replace the bag, wipe the compartment with a dry cloth. It only takes a minute but makes a difference.
Always use the right type of bag for your vacuum. Using non-compatible bags may cause leaks or poor fit, forcing you to change them more often. Check your vacuum’s manual and buy the recommended bags to avoid issues.
Store extra bags in a dry, cool place. Heat and moisture can weaken the bag material, making it tear or fail during use. A simple drawer or storage box away from sunlight works well.

Smarter Vacuum Dust Bag Care, Made Simple
Caring for your vacuum’s dust bag may seem like a small task, but it makes a big difference. It keeps suction strong, protects the motor, and helps your home stay cleaner. When every step, from replacing to cleaning, feels simple, vacuuming becomes effortless.
Narwal designs with that same idea in mind—smart systems that make routine care easier. The Narwal Flow reduces upkeep with self-cleaning dust storage, while the S30 Pro Wet Dry Vacuum adds hygienic waste separation and automatic roller cleaning. Both show how modern design keeps dust bag care simple and stress-free.
[cta:narwal-s30-pro-wet-dry-vacuum]
Looking for an easier way to manage dust bags? Learn more about Narwal Z Ultra’s automatic dust collection system. It empties the bag for you and keeps your home effortlessly clean.


